Z
Design Brief
Problem Statement: We want to build a functionin arcade machine that can allow up to four players to play classic arcade games, and maybe even games we program ourselves.
Deadline: 3 months (end of summer)
Audience & Scope: Students at Lathrop
Criteria: The arcade machine must be usable by at least 4 players. It needs to have classic arcade style interface, and it must be able to run at least the simpler classic games.
Constraints: The arcade machine needs to cost us less than $100 in new materials to build, it must have a control panel height appropriate for high school students, and it must be able to fit through the doorways between the engineering room and the cafeteria.
THE BUILD
In the winter of 2016, Andrew, Colin, Jake, and Jason where working in AP Computer Science and suggested that “we should build an arcade machine!”. After a quick search, they found some relatively inexpensive arcade buttons on Amazon and we purchased them that day. Those buttons arrived and sat in a box for a few months until summer rolled around. The guys graduated that spring, but decided to come in over the summer to build the arcade machine they had promised. The whole build took about 6 weeks with people coming-and-going as summer work schedules allowed.
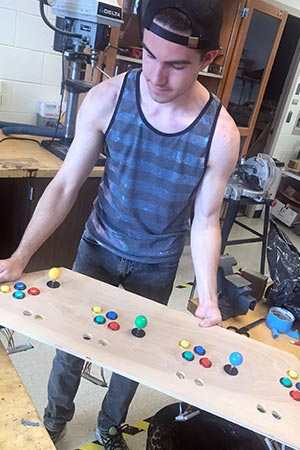
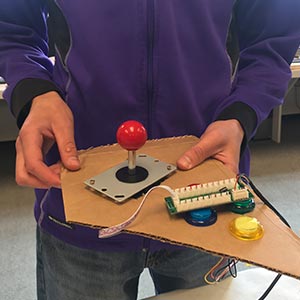 The arcade buttons themselves were the big motivation for building the arcade, and the first step was to put together a prototype of the button configuration. This also gave us a chance to make sure we undertood how the connections between the buttons, joystick, and computer would work. We did quite a bit of research – going to a local arcade and measuring arcade machines – to figure out how many buttons each player should have access to. Some of the coolest arcade games we wanted to play only required 2, 3, or 4 buttons so we settled on that. This also let us use the four button colors for every player, spreading the colors out across the control surface in a cool way.
The actual connection behind the buttons was pretty straight-forward. A 4-prong clip connected to each button, providing power for an internal light and enabling the input. Each joystick had a small 6-pin connector that fit right into the back of the joystick, and all these cables attached to a central board (one board per player setup). Then, all of these simply connected through USB to the old computer we had salvaged from our back storage room for the purpose of the arcade.
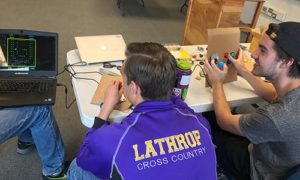 Once we had simple prototypes wired into some cardboard sheets we were able to do some official testing. So far so good!
The next job was to plan out the overall size of the arcade. We had a criteria that the machine be able to be moved between our engineering lab and the cafeteria or gym using a simple dolly. That meant that at least one of the dimensions of the arcade cabinet needed to be less than the narrowest doorway we would have to wheel it through. This meant that we needed at least one dimension to be less than about 32″. We decided that the easiest thing to be flexible with was the depth of the machine. We had purchased a cheap 30″ flatscreen tv off Craigslist to serve as a monitor, so we knew that the overall cabinet could be relatively slim.
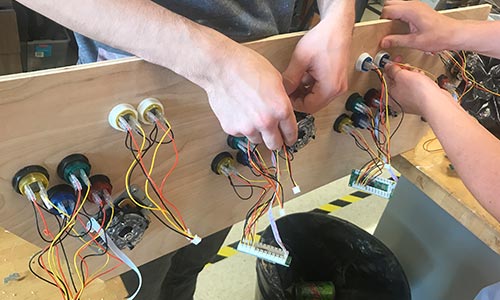 The next job was to build the larger, complete control panel knowing that it could be as wide as we needed it for four players. We measured out proper hole sizes for each button type and the joystick, and measured their locations on the control panel. After a lot of second-guessing the design, we eventually cut the nice 1/2″ birch plywood we had found in our scrap pile for the control panel. We wired all the buttons and controls in place and went for another round of testing, this time with all four players. Still working!
After this, the control panel needed to be boxed into a larger casing so that it could fit onto the larger cabinet. In order to reach our goal of a cabinet depth less than 32″, we had decided to make the control panel removable. The control panel added quite a bit of depth and bulk, so making it removable would make the machine more mobile, and would also let us show-off the inner workings of the machine when people were curious about how we built it.
 The assembled control panel now just needed a cabinet to go on. We spent a few days cutting a sheet of 3/4″ plywood into the panels that would be the sides of the arcade, and used some scrap 1/4″ as the front panels. Some 2″x3″ board served as the inner framework that the computer and TV screen were attached to. We hinged the lower front panel and built a small shelf on the inside so that a computer mouse and keyboard could be easily accessible when the user wanted to turn the machine on/off, or start a different game on the computer stored inside.
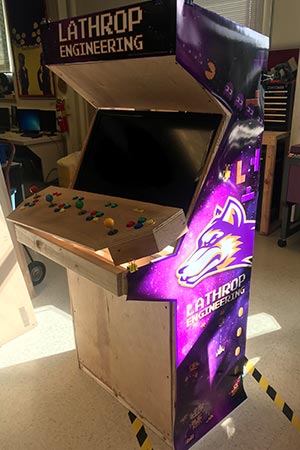
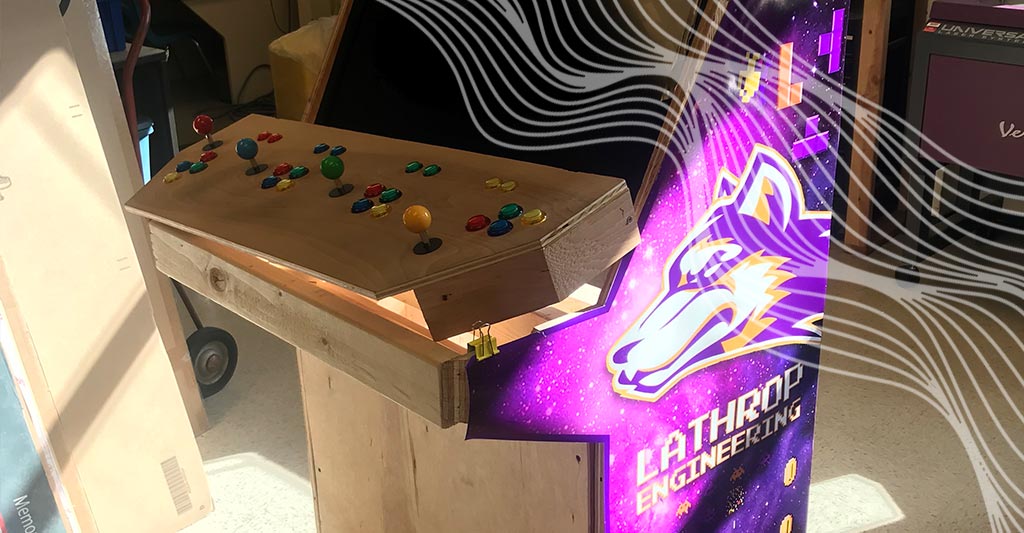
One of the biggest goals of building the arcade was to give us yet another toy tool to recruit incoming freshmen with. This requires that not only does the machine work properly, but it also needs to look cool. To add to the overall aesthetics of the machine we went about creating a set of images in Photoshop that we could print on our large-format printer and attach to the sides and panels of the arcade machine. The shapes were a little awkward to reproduce in Photoshop exactly, so we’re revisiting those to try and get them nailed down a little more precisely. All the same, it added some cool color to the plywood sides, and made it obvious that Lathrop Engineering had designed and built it.
The second thing we did to make the arcade machine extra cool was to build in a small shelf inside the machine so that a digital projector could be placed there when it was on display in a public space. The back of the arcade machine has no enclosing panel, so the projector is able to project the image of the game currently being played on a nearby wall. This way, when eight people are crowded around the screen, other people can watch the game as it is projected on the wall. Of course we also put some old speakers in it so that it plays all the music and sound effects you’d want in an arcade game.
Feedback & Future Steps
The final result works well. Students have been able to play a wide variety of classic arcade games, and the games work properly for 1, 2, 3, and 4 players depending on the design of the game itself. The designs on for the sides and panels of the arcade need some work to get them attached properly, and to make sure that they are protected from scuff marks or tearing. To do that, we’ll probably cover each panel with a clear acrylic panel. In addition, the front door panel has trouble staying closed. We had used simple click-in-place magnetic closures to hold the door closed, but the weight of the keyboard and mouse seem to pull it open. A tougher clasp that can be physically shut would be a good next step.
The coolest next step though would be making our own arcade games. The AP Computer Science group could certainly put together some simple Java games that could read the joystick/button inputs and use them to update character states in their games. To make that doable, a simple Java library that allowed for basic user interface would be needed. It would also be very helpful to our programmers if such a library had some built in 2D graphic tools to make the graphics not such a heavy lift. Overall though, the arcade machine has been working well and is a lunch-time hit!
Total Build Time
- about 30 hours spread over 8 weeks
Materials
- 24 light up arcade buttons
- 4 4-directional joysticks
- USB controler boards that came with controls
- 2 sheets of plywood
- 1 old computer from the storage room
- 1 30″ flat screen TV off Craigslist
- 1 projector (only used for special events)
- 1 keyboard & mouse
- 1 long piano hinge