Z
Design Brief
Problem Statement: We wanted to build a pair of wooden kayaks from plywood, mostly to see if it was possible for us to do it
Deadline: 3 months (end of summer)
Audience & Scope: The builder and their close friends (who might use the boat)
Criteria: The boat needed to float, paddle in a straight line, and look cool.
Constraints: We were limited by the tools we had in the lab, and the materials available here in Fairbanks. We were willing to spend as much time as needed on the project, but ideally it would be done by the end of the summer. We also wanted to try and keep the total cost per boat under $500. (edit, the actual cost ended up around $600)
THE BUILD
In the spring of 2018, Laz had just finished his last required project of our Introduction to Engineering & Design (IED) class, and he was starting to think about his final Unit 12 “Make Something Cool” project. After thinking for a while he declared “I want to make something big.” We started looking into kayaks as I had been thinking about trying to build a kayak for a long time, and this seemed like a s good a time as any to try it out. We found a good set of plans for a kayak called the “Petrel Play” at Chesapeake Light Craft and ordered the paper plans from them.
 The plans came with full-size drawings as well as a lengthy book of instructions for how to accomplish each step along the way. The plans outlined the “stitch-and-glue” process whereby panels are cut from plywood, stitched together with wire to create the boat’s shape, and then epoxied (glued) together before removing the wire stitches and finishing the boat.
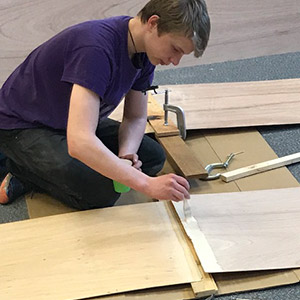
To make this work, we first picked up 6 sheets (3 per boat) of 3mm Marine Grade plywood from a local hardwood supply store. These sheets were 4′ x 8′, but we needed panels that were 2′ x 15′. So we started by cutting the panels lengthwise and then scarffing the plywood together. The scarff joint was about 1/5″ wide and involved using wood glue to connect the two panels end-to-end with a tapered overlap. Lots of time went into sanding a good joint, but then the gluing was all pretty quick.
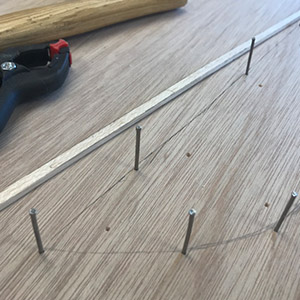 After that the job turned to lofting the plans from the full-scale drawings onto the plywood. This involved a few hours of transferring the designs. We laid the paper plans out on top of the plywood and clamped it in place to keep it from moving while we worked. We then used a finishing nail and hammer to tap small holes through the paper into the plywood. Removing the paper we were left with a dotted pattern that showed the outline of each of the panels we needed to cut (about 10 for each boat). We traced out the lines to smooth the edges and give a clear line to cut along. Then, we used a simple jig saw to cut each panel out of the plywood as carefully as possible. Chesapeake Light Craft offers a complete CNC-cut kit for over $1000, and while that would have saved us about 8 hours of work I’m glad we did it all ourselves. Still, we might try and use our own CNC router to create some custom-cut panels the next time we do this project.
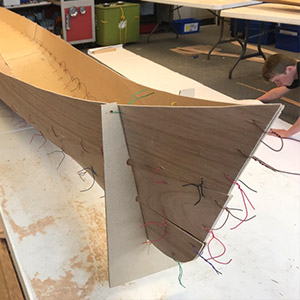 With the plywood scarffed, plans transferred, and panels cut out: the next step was to drill and stitch the hull panels together. This is when the boat really started to take shape and develop the ‘character’ of a real boat. Part of the plans called for cutting out some V-shaped forms and as we used small wires to hold the panels together to each other as well as to the forms the shape of the boat became more obvious.
We spent a few days stitching the panels for both the hull and the deck (speparately), and then sanded between each pair of panels to try and make them fit together nice and smoothly. This is one place where some CNC cut panels would be nice, because the edges of the panels could be automatically chamfered to a helpful angle. As it was, it took quite a bit of time to seat the panels against each other nicely.
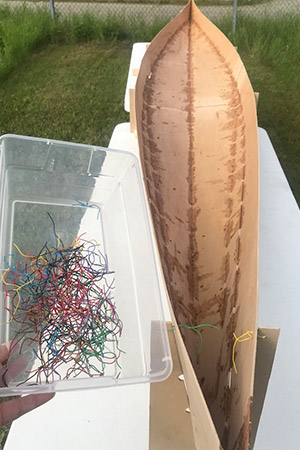 Once all the panels were stitched together and seated together along their edges, we then got to glue the seams. The plans originally called for a “CA Glue” to be used to tack the panels together. Since we couldn’t find any, we just mixed a little epoxy with some saw dust (we had plenty) and used that at spots along the seams. Since this was our first time through, we probably over-did it on the amount of epoxy we used – better safe than sorry – but after it cured we were able to cut all the stitches out of the panels and have the hull and decks free-standing.
By now the boat was really looking like a boat, and it felt like the overall concept was taking shape. Our next job was to seal the inside and outside of both the hull and the deck with a layer of fiberglass and epoxy resin. We used stretches of 32″ 3oz fiberglass to cover the insides of both the deck and the hull. We then used West Systems epoxy resin along with their “Special Clear” hardener. Mixing and spreading the epoxy went pretty quick after we figured out the process. Some particularly hot days made things go even quicker as the epoxy was drying relatively fast.
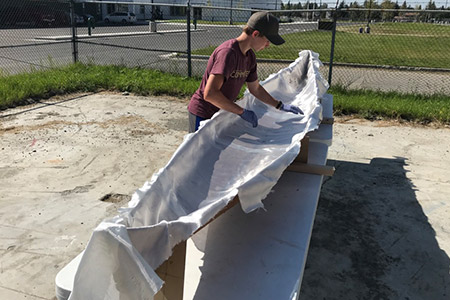 Eventually both insides had been fiberglassed, and the next step was to assemble the boat halves into a single whole piece. This job involved something the author of our instruction book referred to as using a “brush on a stick”. The challenge was that the top and bottom – both fiberglassed on their interior surfaces – needed to be joined with fiberglass and epoxy as well. We cut 3″ wide strips of fiberglass long enough to lay down along the entire edge of the boat: 14 ft long. We then soaked them in epoxy and then tried to spread them along the inside of the encolsed kayak shape. We had the hull and deck velcro strapped to itself to hold together during the whole process.
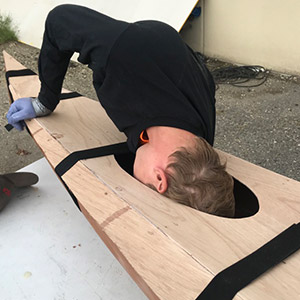 The problem here was that the strips of fiberglass were fraying at the edges while dripping with glue. Our best efforts with the brush-on-a-stick were frustrating for sure as we tried to brush the fiberglass strips into the boat. Since we had decided to only put one hatch in the boat, that meant that we could only reach through the hatch and/or the cockpit. This required then trying to spread the wet fiberglass strip nearly 6 feet up into an unreachable corner of the kayak’s interior. In the end, the job got done but it wasn’t pretty. In retrospect, using actual fiberglass tape (with clean finished edges) could have helped out tremendously.
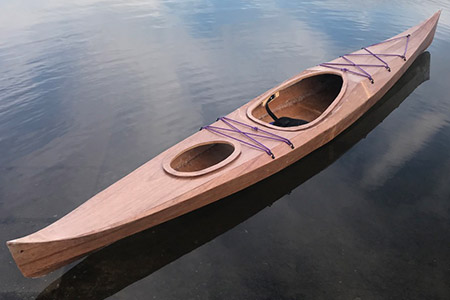
Once we had the two halves glued together along that inside seam, it felt like we were down to mostly finishing work. We got to fiberglass and epoxy the outside of the hull to wrap up all the big fiberglass work. We then cut, fit, and glued two additional rings of plywood around each of the holes in the deck: the cockpit and the hatch. Both of those had one loop that acted as a spacer, and a second (slightly larger) loop that functioned as a finished ring. Ideally, a future project could be to measure and sew a properly fitting cover for either/both of those holes.
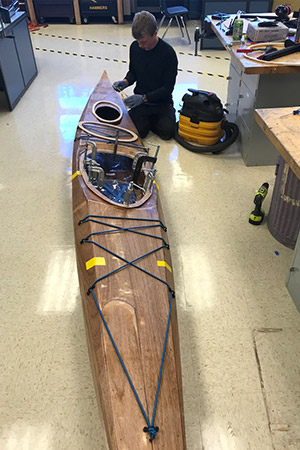 We then got to glue in the foot pegs, attach the adhesive seat, and mount the back rest so that everything needed to sit the paddler in the boat was taken care of. One of the last things we did was to plan out, measure, drill, and rivet the eyelets in place to run the colored shock cord through for deck rigging.
After all those little parts and pieces had been finalized and we went around to make sure that most of the little scratches and blemishes in the boat were cleaned up, the kayaks were pretty much done. There’s always more that can be done to make a long-term project like this nicer or neater, but for a first attempt, these two boats turned out pretty clean. There’s no doubt that if we do the project again we’ll have a lot more information as we get started, and making some adjustments to our process could save a lot of time and fix a lot of the smaller mistakes we were stuck with on these first boats.
Feedback & Future Steps
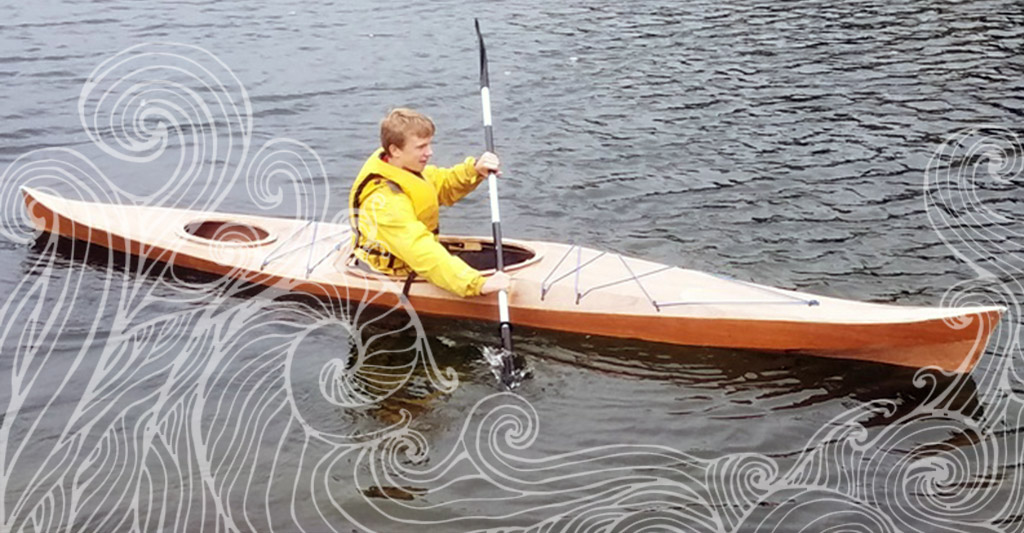
First, it’s worth acknowledging that these boats met all three of our main criteria from the beginning of the project: the float, they paddle in a straight line, and they look pretty cool. There are certainly some small things that could be improved, but for the most part these boats turned out excellent. Probably the biggest improvement that could have been made to our prototype boats would have been to find a better process for connecting the hull and deck together. Using the “brush on a stick” to try and roll out wet strips of fiberglass was not ideal, and the resulting finish on the inside of the boat left many points that were rough, scratchy, or downright sharp. More time filing those spots down and cleaning them up would help, but in future kayak builds we’ll just want a better process. That much I’m sure of.
We hope to do this kayak project again sometime, and if we do there are plenty of things we would change about the process or about the product we were creating. In addition to streamlining the build process so that it happens significantly faster, we also want custom cut some vinyl lettering and give each boat a unique name. Maybe the color of the lettering could even match the color of the shock cord on the top of the boat. Also, we’d like to try and find a way to put the builder’s name into the boat using our laser. The tough thing is that our laser’s cutting footprint is only 12″ x 24″ and every part of the boat is much bigger than that – so we’ll have to see what we can figure out.
Total Build Time
- about 45 hours spread over 3 months
Materials
- 3 sheets of 3mm Marine Grade Plywood (per boat)
- 20 yards of 3oz fiberglass (per boat)
- 1.25 gallons of Epoxy w/Special clear hardener (per boat)
- 1 kayak seat & back rest
- 1 pair of adjustable foot pegs
- 1/4″ shock chord
- Around 12 rivet eyelets